
There are many different sources for I can use for pigments, including plants, clay, soil, bones, and rocks. Most of the plants aren’t lightfast, so I don’t use many of those, but the main source for my Paleo Paints is rocks. While rocks may be plentiful and easy to find wherever you are, not all of them are good for, or easy to work with, for making pigments. Sometimes there is good color in very hard rocks, but the pigment rocks I like using the most are soft enough to be able to grind down into fairly fine powders that can easily be washed and separated for nice, smooth paints.
But do I go around whilly-nilly testing just any rock, plucking them off the ground or out of the creek at random? Sometimes… lol. But not *usually*. Sometimes I do test rocks at random. But there is at least a little method to my madness. I’ve never tried to explain it to anyone before, though, so feel free to comment with questions if I didn’t answer yours.
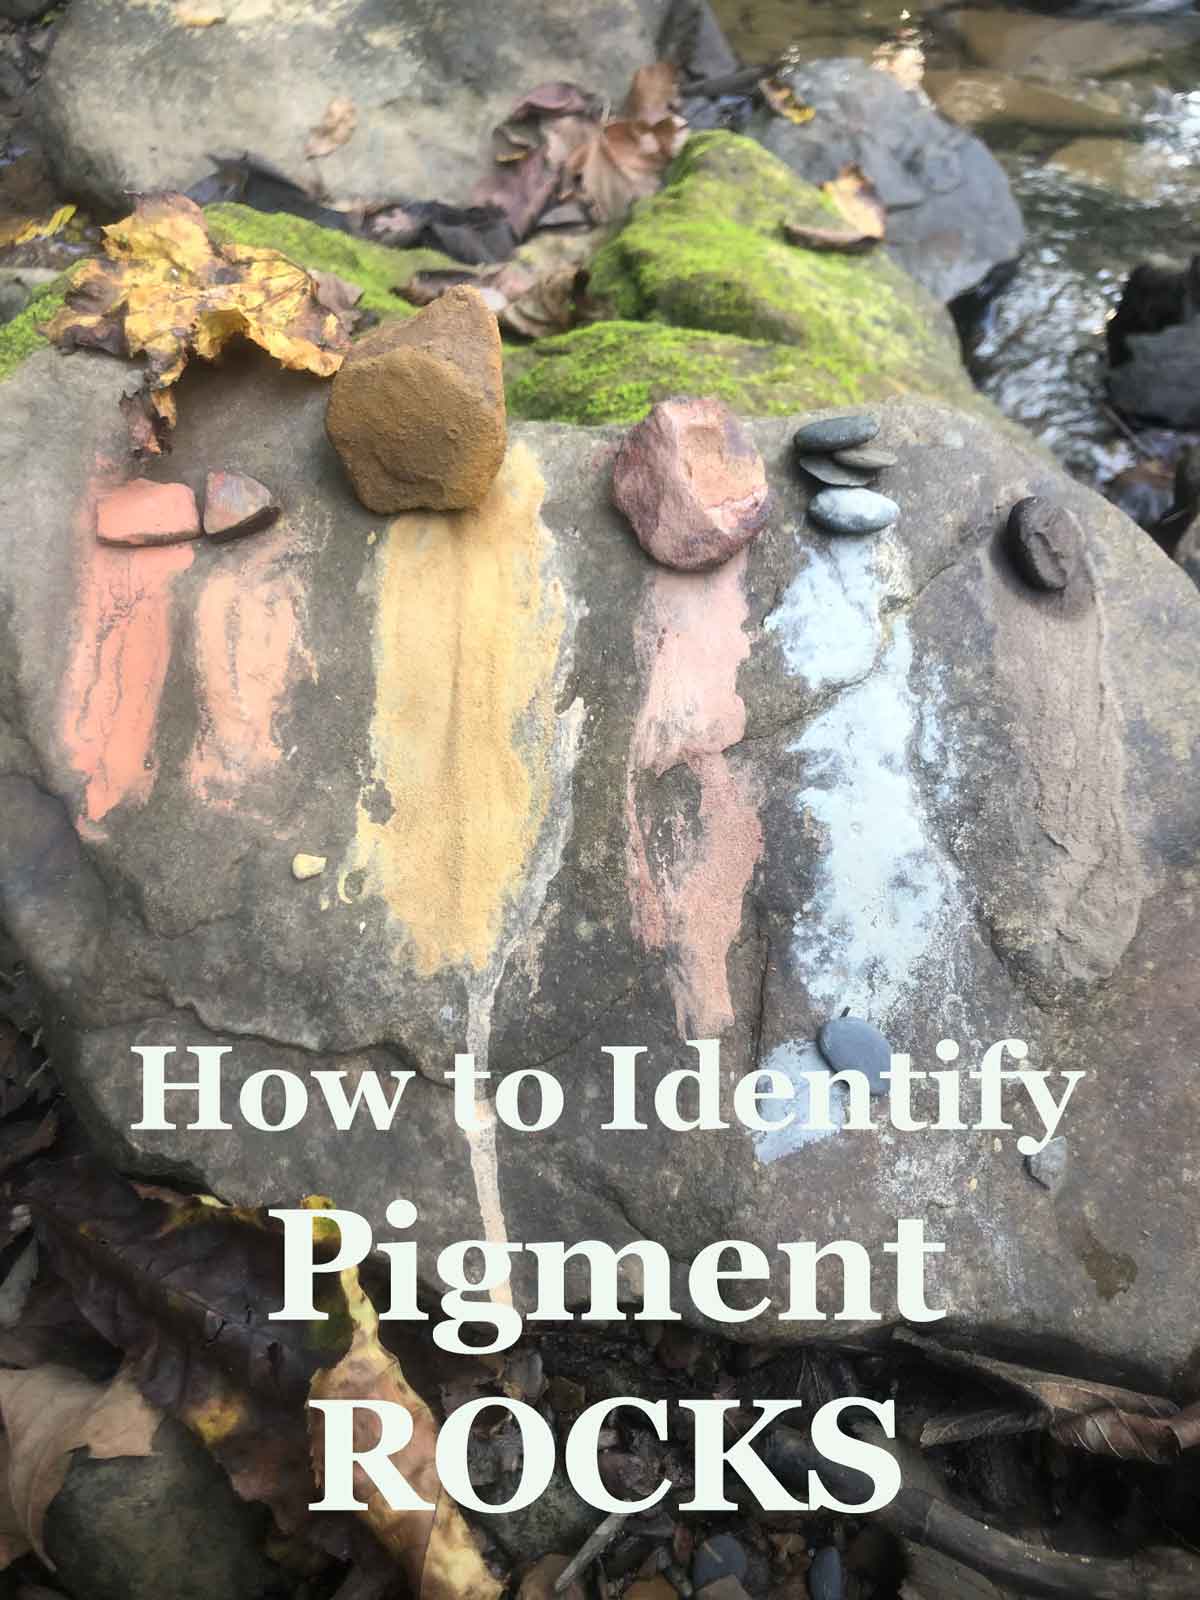
Here’s my How-To for Identifying Pigment Rocks
Total Time Needed :
10 Minutes, once on location.
Total Cost:
0 USD
Required Tools:
– your hands– your eyes– rocks– water
Things Needed?
– rocks– water
Steps to Testing Rocks:

Find a source
Go to a place that has rocks. I go to our creek. Sedimentary rocks are most often the kind that makes good pigment rocks for me here at Wild Ozark. Sandstone rocks are a good start. Shale works, too. Look around at the rocks.

Look for color
When the rocks are wet, like if they’re actually in the water, the color is easier to see. But you can still find color in dry rocks too. The ones in my hand have a nice terra-cotta color to them even though they’re not wet. We will wet them in the next step, though. Head over to the water.

Test your rock
Wet the rock you want to test and then rub it on a larger rock. Does it leave a nice streak of color? The more easily it leaves color, the richer your resulting pigment will be. If it only scratches the larger rock and doesn’t leave color, then throw it out. If it scratches white, unless you’re testing limestone, throw it out. You want a test that produces lots of easy color. Have fun!
Here’s a video that shows how I do it. You’ll probably get a good laugh out of it, if nothing else.
Want More?
I host foraging hikes here at Wild Ozark just to demonstrate how to pick good rocks for making paint, and more in-depth workshops at will be coming soon once the studio/gallery is finished. Stay tuned to wildozark.com/studio-news/ to find out more about that. Or sign up for my newsletter where I will always make monthly announcements for any classes, workshops, or open studio days.
Making Handmade Watercolor Paint from Rocks
If you’ve found some rocks you want to make paint from and need a tutorial, click through to my pages on making handmade watercolor paint. Here’s a few:
I sell things here, too, like actual rocks, pigments ready to start with the washing stage, pigments already washed, watercolor binder, and paints already made.
If you’d like to see the art I’ve created using our Ozark pigments, check out my portfolio page.
Take my Online Workshop at Skool!

Do you want to:
- learn how to make paints from rocks, soil, or clay?
- Begin Nature Journaling?
- Take virtual plant walks?
- Create nature art or crafts?
Interested in forming a partnership with nature to create art?
ABOUT
________________________________
Madison Woods is the pen-name for my creative works. I’m a self-taught artist who moved to the Ozarks from south Louisiana in 2005. My paintings of Ozark-inspired scenes feature lightfast pigments from Madison county, Arkansas. My inspiration is nature – the beauty, and the inherent cycle of life and death, destruction, regeneration, and transformation.
Roxann Riedel is my real name. I’m also salesperson for Montgomery Whiteley Realty. If you’re interested in buying or selling in Madison or Carroll county, AR, let me know! You can see the properties that I blog about at WildOzarkLand.com.
Wild Ozark is also the only licensed ginseng nursery in Arkansas. Here’s the link for more information on the nursery
P.S.
There’s always a discount for paintings on the easel 😉
Here’s my Online Portfolio
And, Click here to join my mailing list.
Contact Mad Rox: (479) 409-3429 or madison@madisonwoods and let me know which hat I need to put on 🙂 Madison for art, Roxann for real estate, lol. Or call me Mad Rox and have them both covered!
https://www.youtube.com/@wildozark

